Thursday, December 31, 2009

Year in Review, Part One


On this last day of 2009 I pause to reflect on two particular goals. First, I think back to March when my first goal for Heifer International was to be able to purchase a trio of rabbits. That came and went so quickly it made my head spin. (Have to love the progress graphic I kept updating...)

I know that people are always skeptical when a project is much more successful than they anticipate but I attribute at least two factors here in that I'm very passionate about both jewelry and my causes and also what I'm creating reflects my true self and it is liked. Now it's time to stand in front of mirror and get my brain to believe the truth!

So when I totaled up all the regular sales for December and made the Heifer donation, it was enough for almost three sets of honeybees, US$80 for December! That puts us at US$345 for 2009 which is way way way beyond everything I anticipated. I am honored that my jewelry is out in the world being enjoyed and that it is helping empower families with sustainable food.

A secondary goal that surfaced in late October was for the Prostate Cancer Foundation in celebration of Movember. For all the Mo-Stache necklaces bought in the month of November we donated US$5 each. It was such a popular item that we kept making them through December (although I changed the donation to US$3 per necklace to help cover the cost of materials and shipping).

We were able to have all our donations matched per dollar through the Safeway Foundation. In two months we raised US$180 and plan on continuing the Mo-Stache in our Etsy shop.

Thank you to everyone who made 2009 a phenomenal year -- here's to continued success in 2010.

Wednesday, December 23, 2009

Sea Change -- or how I need winter to be done already, thanks.

Actually, the more I look at this necklace it is rather evocative of a stormy ocean, oh well. But I've had these freshwater pearl beads since September when we were able to go to Hilton Head Island, South Carolina. The little green shells I picked up a couple weeks ago and something just clicked in my head with the satin ribbon.

It's a piece that makes me wish it smelled like the ocean too...

seachange2

Sunday, December 13, 2009

Everything I learn is from the Internets.

I said that yesterday to Rebecca aka Smelly Rhino and it took her fancy. It was true when it came to craft shows though and I participated in my first one yesterday with the Etsy North Georgia street team. We had a holiday bazaar at Jan aka Pamper Pantry's house and I thought it was fantastic. I definitely want to do more and I learned a lot from the experience.

Katey aka Snarky Design shared a table with me and our minds work brilliantly together I must say. She had the purple fabric and boxes for giving everything different height on the table. The Friday night before we were randomly talking about holiday decorations and she told me to bring my wee lil tree and we ended up putting earrings on it.

holidayshow1

I had also seen a blog post by Galleria Linda on custom earring cards. She had a photo from a friend who had made some tent cards so they would be able to write on the back, etc. I picked up some of the same cardstock I've been using with the eco-friendly theme (it is also 70% recycled content) and that's what I used for the flat part of the table.

These were a great idea and really worked well for people. They were able to pick up the whole card and touch the earrings and easily take them out to try them on, read the back for the materials etc. without a lot of hassle. I will definitely do that again and would recommend it to anyone who likes to do their own packaging.

holidayshow3

Although the tree with earrings for ornaments was a cool idea, in practice it didn't turn out to be as effective. The way people would scan our table was to start at the left with the pyramid bags that Katey had made and then down to the earring display cards. I would have to point out the smaller pyramid bags under the tree and the earrings on the tree. I think the reason was that people are used to seeing trees as decoration and we were using it out of that element so it was a disconnect. Once people were shown how the tree was being used though then they had no problems with it.

holidayshow4

Janine from Girl Sew Pretty had a really lovely way of displaying her bracelets and necklaces with what looked like willow branches in a large glass jar (and forgive me because I should have snagged a photo) so something to keep in mind for the next show!

I felt very prepared from having read some other online info about what to bring to a show including a mirror which got borrowed by quite a few other people at the show. The traffic wasn't overwhelming and it was good to be able to talk to the other team members as well. We are definitely going to do these more often!

Wednesday, December 9, 2009

The Ethical Jewelry Handbook: a Resource Guide for Jewelers Wishing to Adopt Exceptional Standards -- free e-book by Marc Choyt

I first read Marc Choyt's e-book on the jewelry industry's current best practices in regards to fair trade, eco-friendly and ethically sourced materials about six months ago. When I was first researching how and where to find sources to use in my own work, his website and this information was like a pot of green gold.

He just e-mailed me an updated copy and you can get a copy by simply e-mailing him a request. Please see his website http://www.fairjewelry.org/ for more information. The e-book is 140 pages and filled with articles of interest from mining practices to how to implement simple practices in your business to make positive steps.

Thursday, December 3, 2009

Start to Finish: Pentaloops earrings

If I haven't been posting much it's because I've been busy -- some of it the not so great busy but a large portion has been working on orders including one for a Greek Orthodox church in Wisconsin who wanted a plethora of Pentaloop earrings for upcoming festivals.

copperpentaloops2

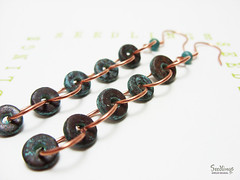
The Pentaloop earrings use beads made from Mykonos Greek clay made by Linden Avenue Designs. I first found MaryAnn's fantastic beads when she posted some of her listings on Twitter. Her prices are great and she has wonderful customer service. She also likes to feature how her creations get used on her blog so please do check out her beads!

The coiled earwires used in these earrings are handmade. Surprised? I was too at how great they turned out. Please visit JewelryLessons.com for the fantastic free tutorial by Abby Hook on how to make them. You'll need to register but its worth it and they also have other tutorials worth checking out.

earwires

For these earrings, while you can substitute beads and metals as desired, you'll want to be sure the beads have quite a large hole, almost a donut, otherwise your jump rings will fight for space and you won't get the dangly motion that is so attractive with these earrings.

I used 19 gauge pure copper wire for the jump rings. I hand wound the wire on a 9mm knitting needle and then cut the rings with a jeweler's saw. You can use a flush cutter -- I just had a lot of jump rings to make and the saw goes more quickly.

uncutcopper
knittingneedlemandrel2

I have found that when cutting jump rings with a jeweler's saw if you use short coils, less than an inch in length and wrap them in masking tape you'll get a cleaner cut and the tape keeps most of the metal bits from scattering about.

maskingtape2
sawing2

Especially because the jump rings are on the big side, I recommend conditioning them by opening and closing them flush, and smacking them a few times with a rubber or nylon mallet. Although most books will tell you not to tumble your jump rings with your shot or tumbling media because you'll be picking out jump rings forever, I had so many jump rings I decided to go ahead. I wasn't picking them out for too long...

conditioningring2
cutrings

Because the finished earrings have a clay bead component I didn't want to chance tumbling them at the end. Tumbling did a nice job of getting most of the errant burrs out of the jump rings but I still kept a small file handy for ones I found while I was putting the chains together.

Once you have at least 10 jump rings you can start to make the chains for your earrings. Open one jump ring and add two of your beads -- close the jump ring. Open another jump ring and pass it through the second bead you added to the first ring and then add another bead. Repeat until you have used 5 beads and 5 jump rings. Set this chain aside and make another with your remaining 5 beads and jump rings. You should have two lengths of bead/jump ring chain when complete.

ringsandbeads1
startingchain2
endchain

I made coiled earwires using the method described in the tutorial from JewelryLessons.com mentioned at the beginning. To complete the earrings I opened the last jump ring from my bead/jump ring chains and added the earwire.

During this process I made twelve pairs of Pentaloops!

plethora

Resources:
Mykonos Greek Ceramic Beads by Linden Avenue Designs

Coiled Earwires Tutorial by Abby Hook on JewelryLessons.com (free with registration)

Pentaloops Earrings at Seedlings: Jewelry Because on Etsy.com

Monday, November 23, 2009

Start to Finish: Lariat Necklace in Steel with Vintage Music Paper Beads

Click here to view the entire tutorial!


Introduction

Working with materials found around the house or at the hardware store to make jewelry for yourself or friends is a lot of fun. You can substitute the materials used for really anything, it is the technique that can be used again and again for a variety of necklaces.


I have a deep background in music – I started playing the piano at age five and have a bachelor’s degree in music composition. I spent a semester in Ghana studying the role of women musicians in traditional groups throughout the country. It is only fairly recently that I was given a chance to combine all these factors into this necklace.


The vintage music paper beads are from Tanith’s Odds and Ends at http://www.etsy.com/shop/tanithsoddsandends which were provided for use in this tutorial.


Some fantastic tips about working with steel wire can be found in a past Beading Daily blog post by Jean Campbell, http://www.beadingdaily.com/blogs/daily/archive/2009/05/20/7-tips-for-using-steel-wire-in-your-jewelry-designs.aspx but here are some quick points:


  1. Don’t use your nice jewelry tools i.e. round-nose pliers, flush cutters etc. – keep a separate set for working with base metal wire. I had an old set from when I first started working with wire but also purchased a basic wire cutter from the hardware store just for steel wire.

  2. Expect to get dirty. Wash your hands well after handling wire and don’t eat or drink or keep open containers in your work area.

  3. Consider sealing your finished piece with clear acrylic sealer or spray to guard against rust and to keep any stray coating off your clothes.


Goal


This tutorial will guide you through making a lariat length (anywhere from 30 to 50-inches typically) necklace with vintage music paper beads and steel wire.


I used some recycled glass beads from Ghana, krobo beads, for a touch of color at the bottom.


Click here to view the entire tutorial!

Sunday, November 8, 2009

Offline for a bit.

Due to a family emergency my Etsy shop will be in vacation mode and I will have limited online access for at least a week. Thank you for your understanding!

Thursday, October 29, 2009

Do you have your Mo-Stache for Movember?

My hubby is the most precious being in the universe to me. I know that cancer runs in his family. He has told me several times that he is very worried about it so when he came to me and asked me if we were doing anything for Movember, I said, 'what's Movember?'

He directed me to the section of the Prostate Cancer Foundation website with a bit of info and an excellent video.

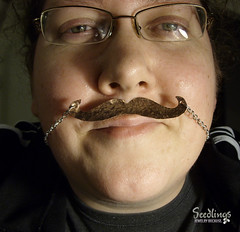
He had an idea for some earrings so that ladies could participate by showing support and raising awareness. I agreed to make a prototype and also thought it would be cool to make a necklace so I started researching moustaches.

movember

I was drawn to the handlebar moustache (or sometimes spelled mustache) and decided to work with copper sheet due to the color. Using pretty much the same technique described in the previous Start to Finish post on the hammered copper disc earrings, I sawed out some tiny staches.

movember2

Although the finished earrings photographed fairly well, they just didn't have the same eye-catching appeal as the necklace. When I showed hubby when he got home from work he described the necklace as "B-A" which translates to 'badass.'

mostache3

As I said, I love my hubby dearly and would sport a jaunty mustache to help raise money for Movember, so that's what I'm doing.

mostache4

You can purchase your own Mo-Stache, lovingly crafted, from the Seedlings shop on Etsy or from http://www.seedlingsjewelry.com -- US$5 of each sale goes to the Prostate Cancer Foundation.

Sunday, October 25, 2009

Start to Finish: Hammered Copper Earrings

After a mopey month, the last couple of days have been creative storms. With hubby Jim agreeing to take up more of the marketing activities I suddenly don't feel so overwhelmed and ideas are just pouring out in a good way.

One of the activities I want to focus on with my blog is to show work that I'm doing from start to finish as well as tutorials when those make sense. I learn mostly by reading books and finding information online and I love folks who do share their information in return.

This afternoon I tackled a project that I bought materials for two months ago: 24 gauge copper sheet, blue rubber Dremel polishing tips, tripoli and rouge buffing compounds. I had seen these hammered copper earrings in the Chic Metal jewelry book by Victoria Tillotson and felt they would be a good next step from the metalsmithing class I wasn't able to finish earlier this year.

[Safety seal says, 'arf arf' which translates to put your dust mask on, eye protection, and when you get to hammering to put your earplugs in!]

I started by cutting two identical circle shapes out of the copper sheet. I used the base of my earplug carrier for the size and first put them on tracing paper, glued to the copper sheet with gluestick. Because the copper sheet was a bit thin, sawing went rather quickly although wasn't as smooth as I've gotten used to with my new method for sawing jump rings.

hammeredearrings1

Once the circles were cut out, I filed down the edges and rough spots starting with a large file and then switching to a smaller one to try to get the edges as round and smooth as possible. I probably could have done more filing but I like a bit of an organic circle and knew that the hammering process around the edge would wiggle things out too so I wasn't overly concerned with perfection, just wanted to make sure there weren't any really sharp or odd bits.

Using the ball end of the hammer I started gently hammering starting at the edge and moving in concentric circles, overlapping where needed so that the entire surface would get bonked. Doing this caused the copper sheet to curve up gently at the edges but again, a nice organic touch and will help catch the light along with the hammered texture.

hammeredearrings2

Once I was happy with the hammered texture it was time to add a hole for the earwire. I have a new center punch that went right through the copper sheet although I was only going to use it to mark where to drill. Oh well, it worked so no worries.

Next, time to work with the Dremel tool (as I didn't have to load up the drill bits this time). I loaded up a blue rubber polishing tip, put one of the hammered discs into the wooden hand vise (because I have found it helps my stability and also because copper heats up quickly) and smoothed out the outside edges some more.

Next I switched to a felt head and used some tripoli polishing compound on both sides of the copper rounds. I know the backside of the earring isn't going to see a lot of action but if you wear your hair up a lot like I do, having a funky side to an earring that you don't want anybody to see isn't great fun.

hammeredearrings3

I had no idea how shiny this process would make the copper. I've been using my tumbler for chains and earwires and it does a fabulous job but for large surfaces using the Dremel really makes a difference.

hammeredearrings4

The last step was to whip up some earwires so I used some 19 gauge copper wire and used a new set of mandrel pliers to make a matched pair to work with the discs.

hammeredearrings5

The end result is a very classy pair of hammered copper earrings, not too big and not too small.

hammeredearrings6

Monday, October 5, 2009

Chicks, man...

Thank you to everyone who purchased jewelry during September! Twenty percent of the proceeds went to purchase chicks from Heifer International. This puts our overall year-to-date donations at $220. Unbelievable from March when the initial goal was to be able to do one beehive by the end of the year.

Wednesday, September 30, 2009

The funk is over (I'm folding my arms on it anyway...)


Apparently when I've made up my mind in certain areas I can be quite stubborn. Hubby teased me one day when I declared, "I've folded my arms," but he has a point. To that end, I've folded my arms on my creative funk by making a pair of earrings for my friend Justa.

She stopped to visit today at work and had on a beautiful necklace with a deep green and silver focal pendant strung with brown and green beads (yes, I should have snapped a picture with my phone). She said she needed a pair of earrings to match when I realized she was already wearing her pair of The Leaves I made for her many months ago. I chuckled a bit but said okay.

When I got home I looked through my stash and realized the brown carved bone beads I recently acquired along with some dyed green shell beads would be perfect. I put them on a pair of handforged argentium sterling silver earwires I made about a month ago so I hope she'll love this creation.

Nature puts green and brown together a lot and I love the combination! If you've got an idea for some jewelry you'd like to see from Seedlings, please let me know - I love doing custom pieces.

Friday, September 25, 2009

Creative funktopia.


I keep having great ideas - I keep writing them down - I keep trying to execute them and end up scrapping everything (except the beads when I use those).

I am in a creative funktopia, solid now for what feels like a month?

I know it is because I have diverted all my brain energies to working on my professional portfolio (web design) and I'm using jewelry creation as a procrastination device.

To that end, I plan on getting the portfolio to a state where I can live with it and be satisfied with what it is by this weekend.

And no, this blog post is not the equivalent of telling someone you are going to workout and then not doing it...

I did post some stitch markers to the Etsy shop. The design was tested by some friends and they gave them the thumbs up which made me happy.

Sunday, September 13, 2009

Embrace the power of the sun.


I've been working on several fall-related ideas themed around what I consider the four main elements - earth, wind, fire, and water. My plan is to roll out particular jewelry pieces pertaining to those elements for the next four months starting with earth.

I identify most closely with earthy things which may be why this necklace jumped out of my head first. When sketching out general notes for pieces in the earth line, the word embrace kept coming to mind. I did some experiments in August with some earrings, wrapping some pearls around argentium silver wire in what hubby called a "messy wrap" but to me it looked beautiful. The earth is messy, you can't embrace it without getting your hands dirty.

I also associate particular metals and stones with earth especially copper, amber, turquoise and howlite. I think of terms like hibernate, heavy, and enclosed. I don't want the earth element to be something that is stagnant though, it's a positive embrace...a time to reflect and draw stability from that reflection.

This necklace uses seven sunstones which are the official gemstone of Oregon. They were a gift from fellow Handmade Artists' Forum member Dragonclaw as part of a purchase from his Etsy shop earlier this year. I love the gentle color in the sunstones and how they take to their copper embrace without fuss.

I used seven stones, one for each day of the week, so every day during the winter you could have a bit of light. I also connected each stone with a mobius or flower link to keep the energy going. Up the side, seven double rings connect a mobius link to the handforged clasp which ends in a small mobius link. Each link was hand coiled and cut.

This necklace made me happy to work on and happy to finish. I feel the strength of the sun gently radiating through the stones and through the links. I'm not so worried about the winter now.

Related Links:
Embrace - necklace in copper, Oregon sunstones on Etsy.

Sunday, September 6, 2009

Recycling good memories.


I'm not exactly a hoarder but I do have several boxes of keepsakes (the ones that survived the unfortunate flooding incident in college anyway) including jewelry that I no longer wear for whatever reason. I recently went through those boxes in order to consolidate and move them out of cardboard into more easily toted plastic boxes. I found some great memories in those boxes including a pair of simple earrings made from a single flat malachite bead on each side.

I remember having these earrings made at a booth at the Kansas City Renaissance Festival when I was in my early twenties so likely over fifteen years ago, way before I was making jewelry or had any interest in making it even. I do remember being amazed at the ease in which the artisan made the earrings and I wore them every day for a long time.

My favorite assistant professor in college commented on the earrings, telling me that malachite was known for absorbing bad energy and that you should have them cleansed from time to time. Those earrings did their job well I think over the years but I eventually stopped wearing them and they went into a box to be rediscovered.

I think the earwires must have been base metal of some sort but they were completely blacked over, well sort of a greenish black...a color you didn't want to put into your ear that's for sure. The style wasn't really appealing any longer but as a lone bead they didn't really make for good earrings.

I had the idea of making a ring version of the wire-wrapped cuffs I had recently made but was going to use a recycled glass bead from Ghana. I told hubby about the idea and he said, "a round bead might irritate your finger, do you have any flat beads?" I immediately thought about the flat malachite beads and I'm thrilled with the way it fit into the design.

I made this ring for myself as an experiment to see how it would turn out and also because I wanted to recycle that good memory now that I found it again. The ring was fun to make (as were the cuffs) and I have one more of those flat malachite beads. Perhaps I'll share that memory with another ring in my shop soon!

Wednesday, September 2, 2009

New hat from ElephunksTrunk!


I was a fairly big hat person in college (well, they weren't big hats...cept maybe that one with the jaunty feather) but knew that I was in trouble when last year at the Paradiso family reunion I was scrambling to find a good sunhat. I settled, and that's a generous use of the word, for a really bad piece of work from Wal-mart.

I first took notice of ElephunksTrunk's (ElephunksTrunk.etsy.com), Celeste's hats during this year's Etsy YART sale. Something about the vivid orange of her reversible sunhat really pulled me in and I ordered one for hubby's mom. That was a huge success and I thought, 'now, it's just silly that you don't have one.'

So I was very lucky and saved my pennies and ordered my own. Working with Celeste was fantastic - she sent me convos all along the way showing me fabrics she had found that she thought would work well and letting me know the status of my order.

I wasn't even expecting it to be reversible because I had requested a wider brim but she went out of her way to figure it out so it's like I have two hats in one!

These are great customer service lessons for any type of shop but especially important when you are doing a custom order.

Protecting your face from the sun is very important to me as skin cancer runs in my family. Now I can get extra protection and do it in swirly luscious style.

Related Links:
Custom Sunhat from ElephunksTrunk on Etsy
ElephunksTrunk Blog
ElephunksTrunk on Facebook
Follow ElephunksTrunk on Twitter

Tuesday, September 1, 2009

Getting back into the swing of things...


I've not been handling stress well the last few weeks and have felt pretty much like I'm stumbling around (sometimes literally) a lot. I've dealt with a few sick days, a few of hubby's banged up elbows (he's teaching himself to skateboard but that's been fun) and just an overwhelming sense of too much to do even if it's stuff that I want to do. I tend to shut down completely when that happens.

But not today, no sirree, I got back up on that horse and got some neat photos taken of a couple new pieces including Moops (moderate hoop earrings) in copper and a necklace-length Mmm, Mobius.

Tomorrow I start work on learning Full Persian chainmaille weave in a bracelet for hubby so will post photos on that work in progress.

Listings on Etsy:
Mmm, Mobius - http://www.etsy.com/view_listing.php?listing_id=30243130
Moops in copper - http://www.etsy.com/view_listing.php?listing_id=30243515

Saturday, August 22, 2009

Cuffstravaganza complete...hope it fits...

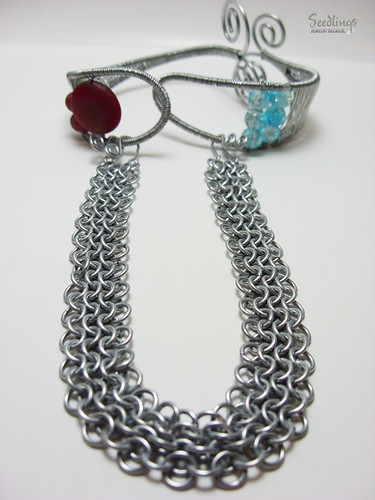
The last bit to work on was the connector piece of chainmaille (used European 4 in 1) and I finished it tonight. I had estimated on the number of jump rings and as my little pile got smaller I sighed heavily thinking about the sawing I had done a few days earlier. However, I was able to finish with even some to spare so hoorah for that!

I made some hooks with simple swirls for the connector piece to attach to the cuffs but since this is an experiment and I'm not even sure if it will look the way I mean it to, I made them easily detachable so that if all else fails Erica will at least have a couple different neat cuffs to work with.

The connector chainmaille could also be converted into a choker necklace without too much trouble...again, that's for if all else fails! Let's be optimistic.

cuff3

I took some photos with a rolling pin to try an approximate Erica's slim arms. I took one with my apparently ye olde blacksmith beefy forearms but didn't want to bend the cuffs so it looks a bit funny.

cuff1

cuff4

It was a challenge and I loved it and I learned several new things in the process so all is well in the world. Going to ship it out either tomorrow or Monday and also going to put up a listing in my Etsy shop for custom cuffstravanza (without the chainmaille connector and with just one cuff) for anyone who is interested!

Put me to work crafting something for you!

cuff2

Wednesday, August 19, 2009

In the Studio on Cafe Handmade!


The lovely folks at Cafe Handmade are running a feature right now on Seedlings Jewelry as part of their In The Studio series! Click here to read the full story.

To say thank you, if you put CAFEHANDMADE in the instructions to seller as part of the check-out process you'll receive 20% off your full order (refunded by PayPal, includes custom orders). Offer good through Sunday, 23 August, 2009.

Put me to work making something unique for you!

Monday, August 17, 2009

All that and a box of rocks!

Oh but it is so much more...and I also understand now why people do "haul" videos on You-Tube. I want to show off how cool everything is!!!

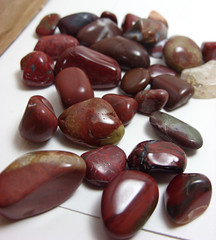
I blew some of my state tax refund on a set of 200 small polished rocks from Etsy seller Dragonclaw (who I met on the Handmade Artists Forum and loved reading about his rock-hounding trips). Matt told me he thought most of the stones would be too small for jewelry but I have a project in mind where the stones are completely captured in wire but for larger wire-wrapped pendants, I can see his point.

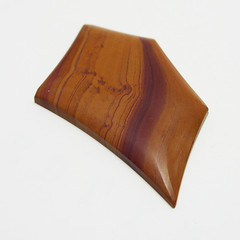
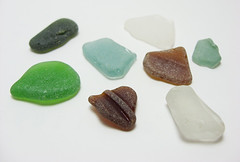
He put in some crazy extras including petrified wood, jasper, an amethyst, quartz, a whole bag of sun stones (the official gem of Oregon), a whole mess of sea glass (I drool)...well just take a look:

petrifiedwood2seaglasssunstonesjasper-n-woodjasper3jasper2jasper1agates

There are more, I have them all up on the Seedling's Flickr feed if you want to peruse in more detail.

All I have to say is it was a purchase well worth it and will keep me busy for months and I highly recommend Matt from dragonclaw.etsy.com and please go buy more rocks from this man and keep him in business! Also, his jewelry is amazing too.

Saturday, August 15, 2009

Cuffstravaganza - almost done!


Made significant progress on the cuffstravaganza for Erica from Worthy Soy Candle and Crochet and got the bottom cuff done as well as a bunch of jump rings (hand-sawed with love) for the chainmaille portion.

I'm planning on making the chainmaille portion detachable (with small s-clasps) so that if Erica wants to wear the cuffs independently she'll have that option. This way she'll have three pieces of wearable jewelry out of one creation.

So next update should be the finished piece! Hooray!