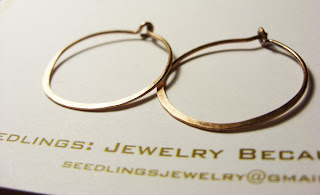
My friend Katey Jackson of Snarky Design (http://kateyj.etsy.com) says to me, “build a lightbox and find the macro setting on your camera.”
So, I did. I even wrote a tutorial on how to make your own cardboard lightbox based on my research and experience, http://www.seedlingsjewelry.com/pdf/cardboard-lightbox.pdf.
The change was dramatic and turned me into a macro photography nut for a bit (lots of photos of all the small things around the house in my Flickr feed somewhere...). Beyond all the things you can do with your descriptions or keywords having clear, beautiful photographs of your creations is one of the most important things you can do to improve your shop.

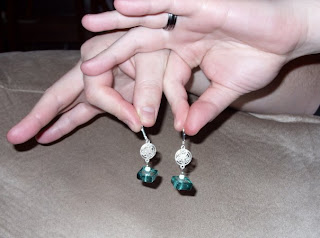
I still continue to experiment with how I like to show my jewelry but other things I have improved during 2009 would be to add at least one shot showing scale (I typically hold the item in my hand) and to have a model wearing the item (myself usually or if it’s a unisex or men’s piece, my hubby). I would like to do a professional photo shoot at some point and had one planned in late 2009 but had to cancel it due to timing and money.
I’m in the process of creating a new lightbox that is a bit more flexible than my early cardboard one. I also found I liked the darker look of taking shots from my workbench as opposed to the very bright white backgrounds of the lightbox. I know this is something I can switch out once I have a new lightbox so it’s an area that I continue to enjoy learning new things with.
Switching up your product photos doesn't have to be super expensive but it can be time consuming. Do your research on what you can do within your budget and comfort level and set a goal to do a little bit at a time. One tip I learned late in the year was to take new photos of items that you relist. That way if you have been really unhappy with the photos it will give you a reason to get everything set up and make the photos better while you are going through the process anyway.
What have you done during the year to improve your photos? Comment with links on your before and after photos (I think I deleted most of my before shots...) or other tips.

9 comments:
Learning about the macro setting was a godsend. I stage my jewelry rather than using a lightbox - I just use the natural light coming into the breakfast room, since that's where there's the most light for most of the day. Unfortunately, this time of year has less light than during summer because of where the sun is, but I've managed.
Before I figured all this out, it was using a halogen lamp at midnight, which lit things up enough, but it was very harsh, clinical light. I'm so much happier with the way things are now.
I had the same issue with the first photos I took with my lightbox. I was so excited to have clear photos I didn't realize how clinical they were. I like using regular sunlight too and also have a fairly bright just desk lamp that seems to create similar light.
great advice, lighting can be tricky. LOL I too went around macro shooting everything for awhile
Beautiful, clear shot--not at all an easy trick. Thanks for all the good advice!
Thanks for the advice! We're still working all this out - getting a lightbox, figuring out what makes our soaps look their best, etc. Though it's not jewelry we're photographing, I think your advice can easily translate to other items.
I'm working on (and I mean I have it sketched out in my head) a new lightbox that is a bit bigger, more portable and a bit more sturdy. The cardboard one was great to get started but I have smacked it around a bit and it's hard to get larger items like necklaces photographed well in it.
Love your pictures now, we just threw out a whole bunch of our old ones. They were terrible compared to the ones we take now.
This has been an interesting issue for me, too... the first jewelry I had ever shot was for my partner Michael's first web-store and I wanted to get it right... I wound up taking the pictures outside, so the light was great. Yesterday I had a batch to do... but silver on snow just seemed like a bad idea. So I shot them indoors, on black velvet and had serious issues with flash bounce. Could you lease post a link to a light box? That sounds like the solution I was seeking. Thanks!!! Cedar
The link to the cardboard lightbox I made is here, http://www.seedlingsjewelry.com/pdf/cardboard-lightbox.pdf
I'm also experiencing problems with black velvet. Not only does macro settings show every single piece of fuzz on the silly stuff but it's like any light on it and my camera freaks out so let me know if you find any workarounds. I just haven't looked up any yet!
Post a Comment