After a mopey month, the last couple of days have been creative storms. With hubby Jim agreeing to take up more of the marketing activities I suddenly don't feel so overwhelmed and ideas are just pouring out in a good way.
One of the activities I want to focus on with my blog is to show work that I'm doing from start to finish as well as tutorials when those make sense. I learn mostly by reading books and finding information online and I love folks who do share their information in return.
This afternoon I tackled a project that I bought materials for two months ago: 24 gauge copper sheet, blue rubber Dremel polishing tips, tripoli and rouge buffing compounds. I had seen these hammered copper earrings in the
Chic Metal jewelry book by Victoria Tillotson and felt they would be a good next step from the metalsmithing class I wasn't able to finish earlier this year.
[Safety seal says, 'arf arf' which translates to put your dust mask on, eye protection, and when you get to hammering to put your earplugs in!]
I started by cutting two identical circle shapes out of the copper sheet. I used the base of my earplug carrier for the size and first put them on tracing paper, glued to the copper sheet with gluestick. Because the copper sheet was a bit thin, sawing went rather quickly although wasn't as smooth as I've gotten used to with my new method for sawing jump rings.
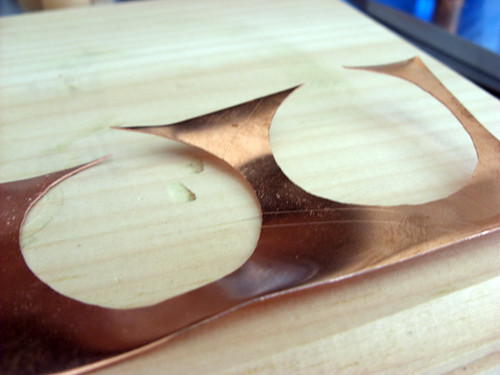
Once the circles were cut out, I filed down the edges and rough spots starting with a large file and then switching to a smaller one to try to get the edges as round and smooth as possible. I probably could have done more filing but I like a bit of an organic circle and knew that the hammering process around the edge would wiggle things out too so I wasn't overly concerned with perfection, just wanted to make sure there weren't any really sharp or odd bits.
Using the ball end of the hammer I started gently hammering starting at the edge and moving in concentric circles, overlapping where needed so that the entire surface would get bonked. Doing this caused the copper sheet to curve up gently at the edges but again, a nice organic touch and will help catch the light along with the hammered texture.
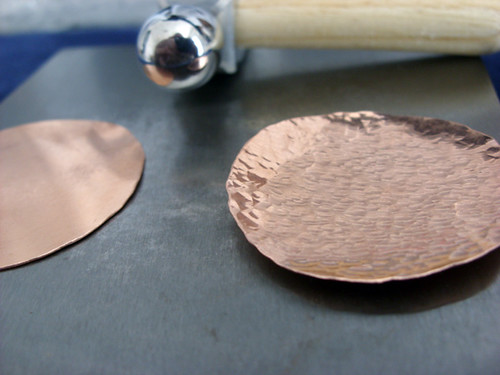
Once I was happy with the hammered texture it was time to add a hole for the earwire. I have a new center punch that went right through the copper sheet although I was only going to use it to mark where to drill. Oh well, it worked so no worries.
Next, time to work with the Dremel tool (as I didn't have to load up the drill bits this time). I loaded up a blue rubber polishing tip, put one of the hammered discs into the wooden hand vise (because I have found it helps my stability and also because copper heats up quickly) and smoothed out the outside edges some more.
Next I switched to a felt head and used some tripoli polishing compound on both sides of the copper rounds. I know the backside of the earring isn't going to see a lot of action but if you wear your hair up a lot like I do, having a funky side to an earring that you don't want anybody to see isn't great fun.

I had no idea how shiny this process would make the copper. I've been using my tumbler for chains and earwires and it does a fabulous job but for large surfaces using the Dremel really makes a difference.

The last step was to whip up some earwires so I used some 19 gauge copper wire and used a new set of mandrel pliers to make a matched pair to work with the discs.
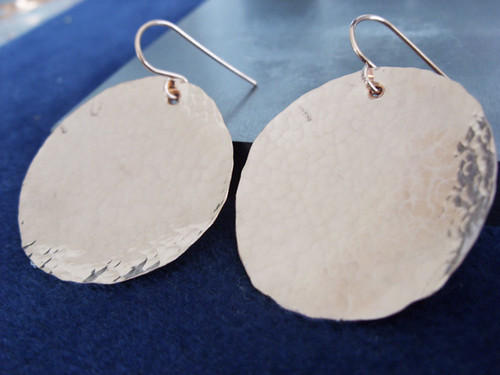
The end result is a very classy pair of hammered copper earrings, not too big and not too small.